So, you want to learn how to play piano?
It is never too late to begin, and we’ve got you covered with everything you need to know about playing piano as a beginner right here!
In this guide, you will learn:
- Proper piano posture
- The keyboard and the musical alphabet
- Five finger scales / left and right hand
- How to read music
- How to learn songs
So, let’s get started!
1. Piano Posture

First things first, let’s learn how to sit correctly at your piano.
Whether you’re playing a grand piano, upright piano, or a keyboard, you’re going to need to look at your posture. Bad posture can hinder your playing, and even cause strain to your back, neck, or wrists.
A good piano posture is one where you can sit up straight (though not unnaturally; think as if you’re wearing a seatbelt), and reach the keys comfortably. Everything in your body—your wrists, arms, elbows, back, neck—should all be relaxed. Your arms will be bent loosely at the elbow, and your fingers will rest on the keys. So, make sure you aren’t sitting too close to the piano; your arms should not feel boxed in or cramped, nor should you sit too far away, where you have to straighten your arms to reach the keys. Keep your feet flat on the floor, and in easy reach of the pedals.
Try to sit more toward the edge of the bench (closer to the piano) than sitting on it as if leisurely. This way, you will have more flexibility to move. As you get better, you will play songs that will encompass a lot of the keyboard, and you’ll have to slide a little to reach them as you do. So, try to prepare yourself for that now.
Now that you’ve got your posture down, let’s look at the keyboard!
2. The Keyboard

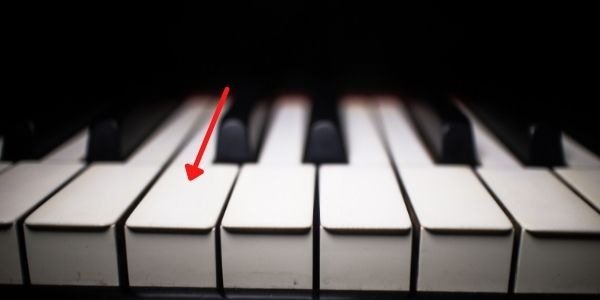
The first thing you probably noticed is that you have black keys and white keys. The black keys are called accidentals, or sharps and flats. But don’t worry; you won’t have to worry about those just yet. For now, just use the black keys to help you navigate the keyboard.
Notice how they’re in a pattern? They go from bunches of two black keys, three black keys, two, three, two, three, etc., all the way down the keyboard.
Now, let’s find Middle C.
Middle C
You know how everything in our solar system revolves around the sun?
Well, on the piano, everything is centered on a key called Middle C.
So this is the note you want to come back to whenever you’re lost amidst the endless sea of white and black keys and need to orient yourself again.
Here is Middle C:

You guessed it—it’s right in the middle of the keyboard.
Notice where it is in relation to the black keys: Middle C is in the very middle of the keyboard, and will always be just to the left of two black keys.
Go ahead and play it. This is your first learned note!
Now, let’s learn about the rest of the keys by learning the musical alphabet.
3. The Musical Alphabet
So, I bet that by now you’re wondering why that key is called Middle C, and what all the other keys are called, right? Well, if you remember your ABCs from kindergarten, you’re already halfway there!
Let’s look at your keys, starting with Middle C.

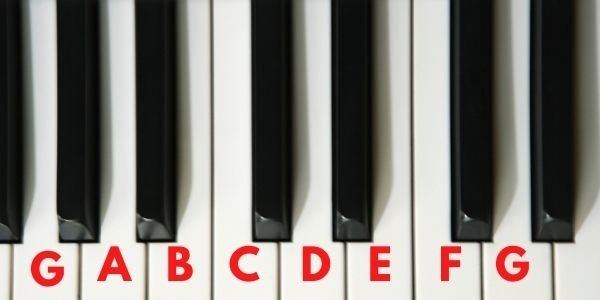
This is the order of your keys, starting from that Middle C. It goes in alphabetical order: A, B, C, D, E, F, and G. However, you do not continue to H, or any other letter of the alphabet after G. You’re just going to go back to A, and starting over again.
This pattern repeats over and over throughout your keyboard.
To make it even easier, you will always have a “C” note right to the left of any two black keys, and you’ll have the note “F” to the left of the three black keys.
See how the pattern repeats exactly throughout all the keys?
Each of these repeated sets of keys (starting with C and ending with the next C, as shown in the photo below), is called an octave. This is because there are 8 notes.
There are 7 complete octaves in an 88 key piano.
To make it even clearer, if you’re playing C in the first octave, it’s called playing a C1. If you’re playing the C note in the second octave, it’s called a C2. Middle C (as depicted above) is called a C4. This is true for every note: whatever octave the note/key is in, you put that number after the note/key you’re referring to, and that is how you can clearly refer to every note on the piano.
To make this easier for you, to remember as you begin your piano journey, you can put stickers on the keys with the note name on them. They sell these stickers all over the internet for a couple of bucks that do this, or you can simply get some masking tape or something similar and write the key names on that for each key. As you get better at orienting yourself around the keyboard, you can just leave a sticker on, say, the C notes, and then take them away completely when you’ve got the hang of it.
Now that you know what you’re playing, let’s learn how to play piano!
4. The Five Fingers
Piano is an instrument that is almost completely played by your fingers alone. Meaning, the techniques you use with your fingers are incredibly important!
Let’s do this one hand at a time, shall we?
The Right Hand
Starting with Middle C, rest your right thumb over the key. Then, rest your other fingers (of your right hand) on the keys to the right of Middle C, one finger per key.
So, going along with the musical alphabet we learned earlier, your thumb will be on C, your pointer finger will be on D, your middle finger on E, your ring finger on F, and your pinky finger on G.
Now that you have the placement right, play each key one-by-one, starting with your thumb, then your pointer finger, your middle finger, your ring finger, and then your pinky finger. So you will play C, D, E, F, G.
This is the five finger scale!
Don’t worry if it feels unnatural; your fingers are not used to moving like this, and your ring and pinky finger like to move together. So practice isolating each finger. Play this scale many times, and play it backwards.
Start with your pinky finger, and play G, F, E, D, C.
Practice the scale forward and backward until you get the hang of it! Start slowly to make it easier for yourself (it does you no favors to practice faster than your fingers can currently go!), and speed it up as you get better.
The Left Hand
Now that you have your right hand all set, let’s look at your left.
Depending on which hand is your dominant hand, this hand will either be easier or harder. So, take things even slower with your non-dominant hand, as it will feel even more foreign to you.
With that said, the left hand is the opposite fingering as your right hand (naturally). If you’re looking at both your hands from left to right, you’ll notice that the first finger of your right hand is your thumb, but the first finger of your left hand is your pinky finger.
This applies when you’re playing piano!
So, to practice the five finger scale with your left hand, you’re going to play the same notes that you played with your right hand just now. Except, instead of placing your thumb on Middle C, you’re going to place the pinky of your left hand on Middle C. Then, continue to the right with your ring finger on D, your middle finger on E, your pointer finger on F, and your thumb on G.
To practice, do the same exercise as before. Just play C, D, E, F, G with your left hand until you get used to it. Once you’re more used to it, play it backwards, G, F, E, D, C.
Practice until these feel comfortable as well!
Playing both hands at once
Now, here’s where things get a little trickier!
Place your right hand in position for the five finger scale, starting at Middle C.
Then, place your left hand in position on the octave below, the 3rd octave, where your pinky will start on C3. (Check out that diagram from earlier if you need to remember where that is!)
Now, play C with both hands at the same time.
Feels weird, doesn’t it?
Now, play D with both hands. Remember, it will be opposite fingers of both hands; your ring finger on your left hand will play D3, and your pointer finger of your right hand will play D4.
Practice going up and down the scale together with both hands to get the hang of it!
Playing an octave scale
Now, let’s learn how to play an octave scale.
Remember earlier when we were talking about octaves, which were the repeated pattern of notes all throughout the keyboard? It goes from C, D, E, F, G, A, B, and then back to C?
These are the keys you’ll play for this octave scale.
You might realize that this scale includes playing 8 notes, rather than 5, and… you only have five fingers.
Have no fear! There is a sneaky little trick we’re going to learn that will allow you to seamlessly play as many consecutive notes as you want with no interruption.
The Right Hand
Let’s start with the right hand again.
Play that five finger scale again; these are the first five notes of the octave scale.
The last note you played on that five finger scale was G. We want to play the next three notes, A, B, and C.
So, this is where we’ll learn some piano techniques. Here, let’s try what pianists call tucking under or crossing over.
In the simplest sense, when you are playing from left to right, you will use the tucking under technique, and when you are playing from right to left, you will use the crossing over technique.
Tucking Under
So, if you are playing an octave scale up the scale (meaning going left to right, or going in order of the alphabet), you are going to play the first five fingers like normal over C, D, and E. Stop there on your middle finger.
From here, we’re going to take your thumb and gently reach it under your other fingers, and play F with your thumb. Then, allow your hand to follow your thumb’s lead, and let your pointer finger play G, your middle finger play A, your ring finger play B, and your pinky to play C.
Try not to turn your hand or your arm too much; you’re just tilting your wrist a little in order to get your thumb to reach. All of this is very relaxed, and the movement itself is actually quite small.
And Voila! You’ve played your first octave scale!
Here is a video displaying this technique: Why crossing your thumb under in piano playing will SLOW you down
If you’re wondering why you switch back to your thumb after the third note in the scale, it’s just math. You want to play an 8-note scale, and you have five fingers. Therefore, you only need to repeat 3 fingers. If you were to wait until you played all five fingers before you tucked your thumb under, it’s much harder for your thumb to reach.
Continue this pattern all the way down your keyboard! Go slow at first to get the hang of it and then pick up your speed as your fingers get used to it.
Crossing Over
Crossing over is a technique to use when going down a scale, or backwards.
So for this, you’re going to start with your right-hand pinky finger at the end of the octave scale, so on the next C note (C5, to be exact). Then, going down (right to left), you’re going to play your ring finger on B, your middle finger on A, your pointer finger on G, and your thumb on F.
Remember: we’re doing this backwards, so you will play five notes first.
Then, hold your thumb on F, and you’re going to cross over your middle finger to play E, and then play your pointer finger on D, and your thumb on C.
And you’re back where you started!
This cross over technique is just like how it sounds: you’re going to very easily cross your middle finger over your thumb to reach E.
Again, think of the video I linked earlier.
The Left Hand
Now, it’s time to try this with your left hand!
This will be exactly the opposite as your right hand.
That means that when you are playing up the keyboard (left to right), you will cross over. When you are playing down the keyboard (right to left), you will tuck under.
Play that five finger scale, starting at Middle C, with your left hand again, to reorient yourself. Remember: you’re starting with your pinky finger now!
Play your pinky on Middle C and play the next five notes all the way to your thumb on G.
You’ll probably feel how this naturally fits now, so this is where you’ll cross over your middle finger to reach A, then your pointer finger on B, and your thumb on C.
Going backwards, you’re doing the opposite and you’ll start with your thumb on C5, and then play your pointer finger on B, and your middle finger on A.
Now, tuck under your thumb to reach G, and allow your pointer and your other fingers to follow so that your pinky falls back on C, and you’re back where you started.
Remember, these techniques are very relaxed tilts of your hand. So don’t try to reverse your hand sideways or move your arm at any weird angles.
Practice doing this all the way up the keyboard using the tucking under technique, and all the way back down the keyboard using the crossing over technique just like this! You’ll get used to it in no time.
5. How to Play Songs
The part you came here for, right?
It’s finally time for you to play some songs!
Now, there are a few different ways to learn songs on piano. I’ll give you a more casual way of learning songs later in the guide!
The first one is by learning to read music, which is the one I’ll encourage every pianist to learn. You don’t need to become Mozart if you don’t want to get that deep into music theory, but it opens up the entire world of learning piano.
However, there are some people who just want to learn to play piano more casually, so I’ll offer a few other options for those folks as well!
How to Read Music
Remember earlier when we were going over the alphabetical note names of the keys on your keyboard? How they go from A–G, and repeat over and over?
Well, here’s what that looks like on paper.
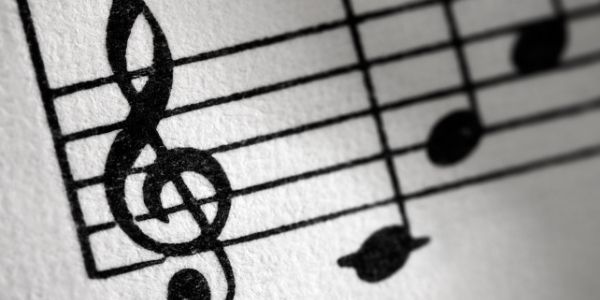
The first thing we’ll look at are the staffs, and they look like this:

This is like the canvas of your song. You’ll see the notes you’re going to play somewhere on here, and we’ll go over that next.
First, let’s look at the top half of this picture.
This is the treble clef.
The treble clef will usually be notes you play with your right hand.
Now, looking at the bottom half of that first image, you’ll see this:

This is the bass clef.
The bass clef shows notes you will usually play with your left hand.
Notice that they all go in alphabetical order, alternating line, space, line, space, etc.
There are a few ways to help you memorize where these notes are, as when you’re reading the sheet music of a song, you won’t see the note name written there.
The Treble Clef
The treble clef (your right hand) and it separates the line notes with the space notes to make it easier for you to see.
There are many acronyms that people used to remember this order of the line notes. One of the oldest ones is Every Good Boy Does Fine. (But you can make up your own!)
For the space notes, if you can’t already tell, it spells out FACE.
The Bass Clef
For the line notes in the bass clef, you have the order of G, B, D, F, A. Going off the line notes’ acronym for the treble clef, an acronym for this can be Good Boys Do Fine Always.
As for the space notes, a popular acronym for A, C, E, G, is All Cows Eat Grass.
(But again, make up your own acronyms if you don’t like these!)
Practice both the treble clef notes with your right hand and the bass clef notes with your left hand, getting yourself used to seeing where the notes are on the staff. Play them in order, forwards, backwards, and out of order—just get used to playing what you see on the staff!
Your goal here is to not only memorize those notes so you can know what they are at first glance, but also you want to get used to the hand-eye-coordination. As you read music, you are eventually going to want to look at the sheet music most of the time while you play, rather than staring at your fingers. It will eventually become natural, but it definitely takes some getting used to.
Investing in a few beginner piano songbooks is something I strongly encourage! They’re filled with songs you can play as a beginner, and they get you very used to reading music.
6. Other Ways to Learn Songs on Piano
Reading music and learning to play this way is a great long-term goal for any beginner pianist; once you are fluent in reading music, you can play anything, and even start composing your own songs if you so wished.
However, if you are impatient to learn some songs while you’re getting used to reading music, there are other ways to play your favorite songs.
YouTube Tutorials
YouTube can teach us just about anything.
Piano is no exception!
Not only that, you can learn to play your favorite songs without knowing how to read music (or not being very skilled in it just yet).
If you simply type your favorite song into the YouTube search bar, and tack on “beginner piano tutorial”, you’ll get a ton of choices!
Reading music can get a little tedious, so it might be a good idea to break up your practicing by doing something like this to keep you interested and encouraged to continue. You’ll probably pick up a bunch of new tips and tricks as well.
Conclusion
It is never too late to become a pianist!
It is definitely something new to your fingers, and music theory can feel like an entirely unfamiliar language (and it sort of is!).
But with plenty of practice and patience, anyone can become the next Mozart!
How was your first experience playing piano? Let me know in the comments!


